
How to Set Up Membership Levels for Your Niche Dating Site
If you’re running a niche dating site — whether it’s faith-based, fitness-focused, seniors-only, or anything in between — one of the most important decisions you’ll make is how to structure your membership tiers and pricing. Done right, a well-designed membership system becomes your most powerful monetization engine. Done wrong, it frustrates users and leaves revenue on the table.
In this walkthrough, we’re going to cover exactly how the iDateMedia membership level system works, how to set up tiered pricing that converts, and the proven strategies that turn free users into paying subscribers.

What Are Membership Levels — and Why Do They Matter for Niche Dating Sites?
At the core of the iDateMedia platform is a concept called Privileges. Privileges are permissions — they define exactly what a member at a given level is allowed to do on your site. Sending messages, joining video chats, viewing who checked out their profile, creating events — all of these are individual privileges you assign (or withhold) per membership tier.
This matters enormously for niche dating sites because your audience has specific, high-intent needs. A Christian dating site member who wants to attend a virtual mixer has a clear reason to upgrade if event access is gated. A senior dating site user motivated to see who viewed their profile will pay for that insight. The privilege system lets you align your paywalls directly with what your specific audience values most.
The key rule is simple: if a member tries to do something they don’t have a privilege for, they get redirected to your Upgrade page. That upgrade prompt is your primary conversion tool — the moment where a free user becomes a paying customer.
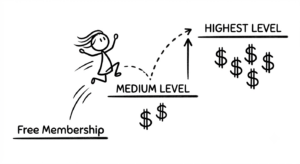
Understanding the Free Membership: Your Built-In Baseline
Every iDateMedia site includes a built-in free membership by default, and understanding how it works is critical before you touch anything else.
The free membership operates on a catch-all rule: it automatically receives any privilege that hasn’t been assigned to a paid membership level. The moment you assign a privilege to a paid tier, that privilege is removed from free members. This means you have precise, intentional control over what your free users can and can’t do — no accidental giveaways of premium features.
You can also disable free membership entirely. With a single toggle in the admin panel, all existing free members and all future registrants can be required to select a paid plan. This is a powerful option when you’re ready to transition out of a freemium launch phase and into a fully paid model.
The Trial Premium Days Strategy
One of the most effective tools for niche dating site conversions is the Trial Premium Days setting. When a new user registers, they automatically receive the full premium experience for a defined number of days. They get a taste of everything your top tier has to offer — and then they have to decide whether it’s worth paying to keep it.
This strategy works particularly well in niche markets where users are highly motivated. Someone looking for a partner who shares their faith, lifestyle, or life stage is far more likely to convert after experiencing real value than someone who only ever saw a stripped-down free version of your site.
Building Your Membership Tiers: A Step-by-Step Overview
In the admin dashboard, membership levels are created and arranged left to right — lower tiers on the left, higher tiers on the right. The highest tier a user holds is the one that governs their experience; once they reach it, all upgrade prompts disappear.
Here’s how a basic two-tier setup might look:
Silver Tier — The Entry-Level Paid Membership
Assign foundational privileges like viewing their inbox and browsing events. This tier gets users invested in the platform without unlocking the most engaging (and motivating) features. Price it accessibly — something like $10/month or $100/year — and use the annual discount to encourage longer commitments upfront.
Gold Tier — The Full Experience
Layer on the high-value privileges: video chat, seeing who viewed their profile, messaging, and any premium content specific to your niche. This is the tier you want most paying members on. Price it at roughly double the Silver tier (e.g., $20/month or $200/year) and make the value obvious in your descriptions.
Important: Privileges do not automatically inherit from lower tiers. Gold members need all the privileges assigned to them explicitly — Silver’s and Gold’s. This might feel like extra configuration, but it’s actually a feature. It gives you the flexibility to create specialty memberships with unique access patterns that don’t fit a simple linear progression. For example, you could create an “Event Coordinator” membership that has rights to create and administer events without having standard messaging access — perfect for a matchmaker or community organizer role on your platform.
Pricing Strategy for Niche Dating Sites: What Actually Works
Niche dating sites have a genuine competitive advantage when it comes to pricing: your members are there for a specific reason, and that specificity has value. Here’s how to price your membership tiers to maximize conversions and revenue.
Research Your Niche Before Setting Prices
A general dating site competes in a crowded, price-sensitive market dominated by free apps. A niche site — Christian dating, senior dating, fitness-focused dating, hobby-based dating — competes in a much smaller pool where members are highly motivated. Niche sites can consistently command a premium over general-market alternatives. Before you set a price, find out what comparable niche sites in your space are charging. Then position yourself competitively, keeping your unique features and audience in mind.
If you have early users, survey them. Even a simple poll asking “what would you pay per month?” gives you real market data instead of guesswork.
Keep Your Tiers to Three (Silver, Gold, Platinum)
More than four membership tiers causes decision fatigue — users become overwhelmed by choices and convert less, not more. Three tiers is the proven sweet spot. Research consistently shows that the middle tier becomes the best seller because people naturally avoid the cheapest option (it feels too limited) and the most expensive (it feels excessive). The middle tier feels like the “smart” choice — and you can engineer this intentionally.
This psychological phenomenon is called the decoy effect, and it’s built into three-tier pricing by default. Your Silver tier sets the floor. Your Platinum tier sets the ceiling. Your Gold tier — priced right in the middle — is where most of your revenue will come from.
Make the Top Tier Feel Like a Deal
The jump from your mid tier to your top tier should feel worth it, not punishing. Load your Platinum (or equivalent) tier with genuinely valuable perks: unlimited messaging, profile boost features, priority visibility in search results, or exclusive access to premium events. Price the jump so it’s meaningful but not jarring — ideally, the additional value should feel obvious.
Offer Multiple Billing Periods and Use Discounts Strategically
Each membership level on iDateMedia can be offered in up to four renewal periods: monthly, quarterly, semi-annually, and annually. All billing is recurring and automated through your connected payment gateway.
Use this to your advantage. Offer a 10–20% discount for annual billing. Users who commit annually are dramatically more valuable — lower churn, higher lifetime value, and predictable revenue. Make the annual option visible and attractive, but don’t remove the monthly option entirely. Some users (like our demo customer Augustus) simply aren’t ready for an annual commitment yet, and a monthly plan gets them in the door.
Credit Card Collection During Registration
One powerful option available in your monetization configuration is requiring a credit card during the registration process — without charging it immediately. The card is securely vaulted for future payments. This significantly reduces friction when it’s time to convert free users to paid, and it lets you migrate users to paid tiers in bulk with immediate billing for those who already have a payment method saved.
Managing Free Members and Driving Bulk Conversions
The Free Member Management page in your admin panel is a strategic tool, not just a list. It shows you how many free members have a payment method saved versus how many don’t — giving you a clear picture of your conversion-ready audience.
When you’re ready to move a cohort of free users to a paid tier, you can select members, assign them a destination membership level, and process them in bulk. Members with a saved payment method are charged immediately. Members without a saved payment method receive an email notification and are prompted to add payment on their next login.
This is especially useful after a successful launch window: run your site free to build a user base, then flip the switch to transition members once you have enough social proof and engagement to justify the ask.
Your Membership Pricing Is Never “Set It and Forget It”
One of the most important mindset shifts for niche dating site owners is recognizing that your pricing model is a living strategy, not a one-time decision. As your costs evolve, your user base grows, and your understanding of what your members value deepens, your membership tiers should evolve too.
Track your conversion rate from free to paid. Monitor which tier most users land on. Watch your churn rate by tier. If Silver members are churning at high rates, your Gold tier’s value proposition may not be compelling enough to drive upgrades. If your Platinum tier is barely selling, the price jump from Gold may be too steep.
Building a thriving niche dating community is a long game — and getting your monetization strategy right is one of the highest-leverage decisions you’ll make along the way.
Need help configuring your membership levels or dialing in your pricing strategy? iDateMedia offers consulting hours to help site owners navigate these decisions. Reach out to [email protected] to get started.